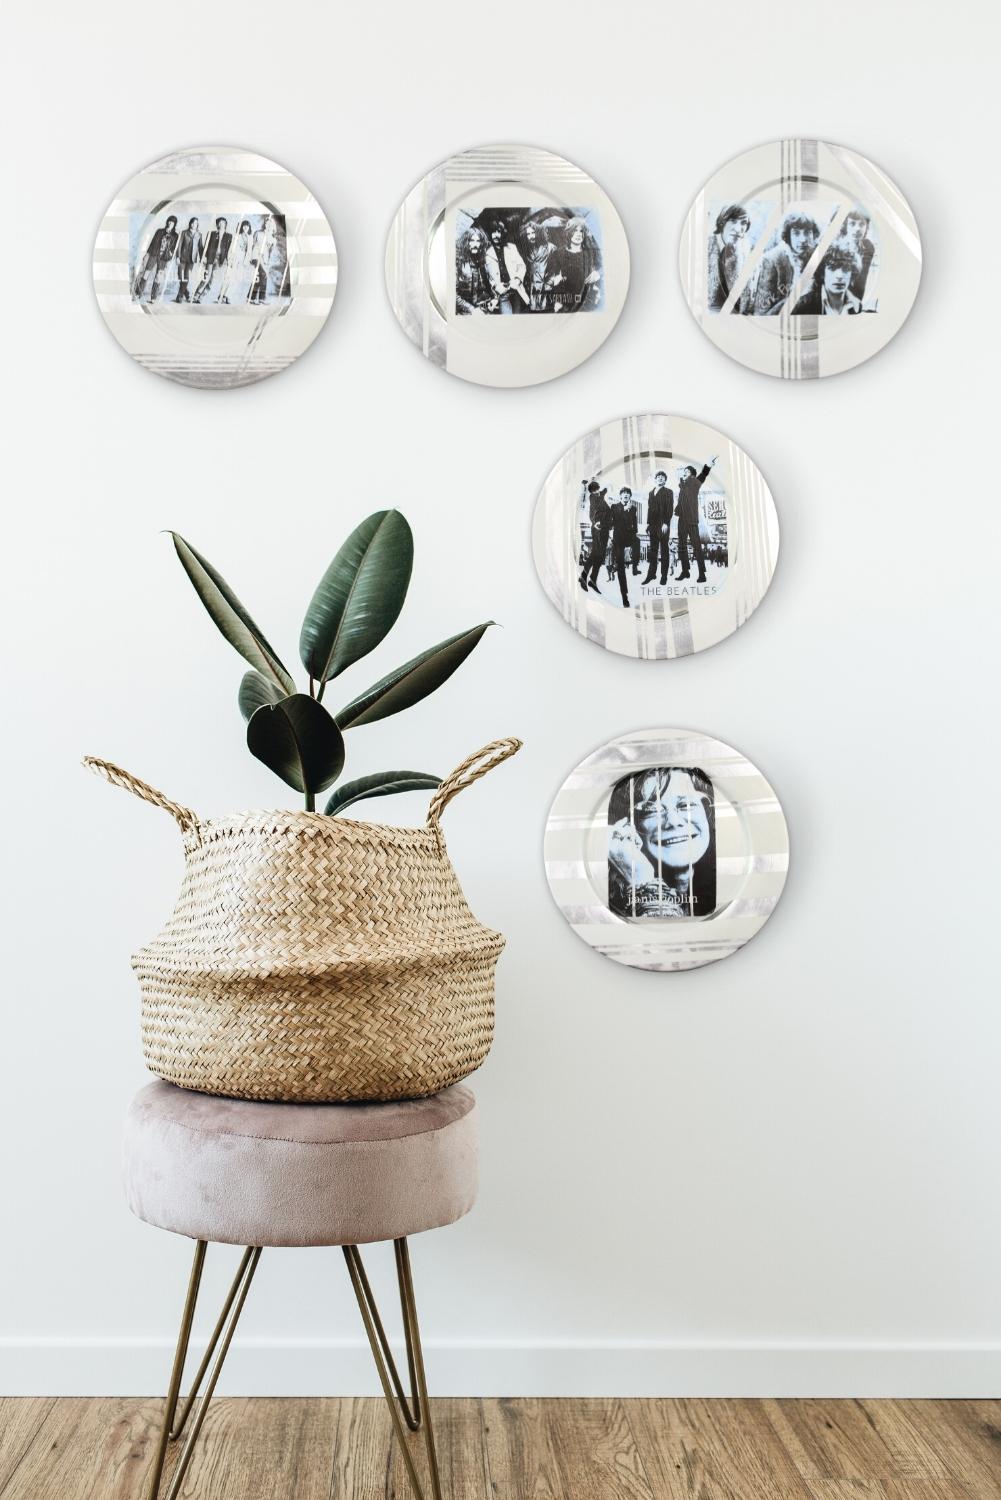
DIY DECORATED CHARGER PLATES
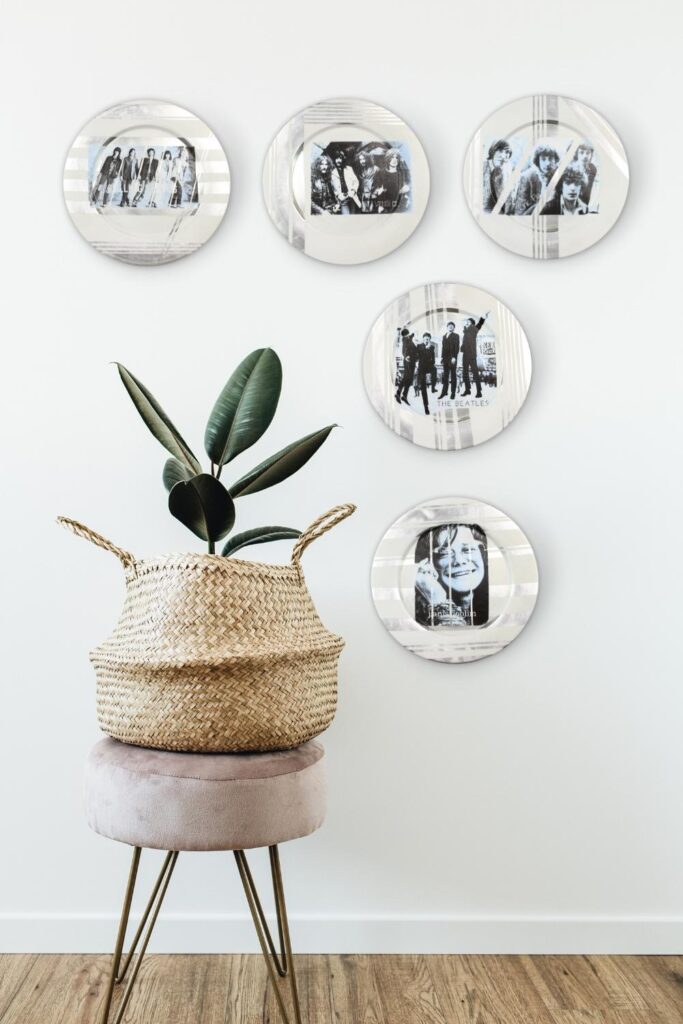
I have a super simple idea of decorating charger plates with decoupage and Mod Podge in just six steps! And the cool thing is you probably already have the supplies in your home.
Add some fun to your walls and get creative! Repurpose your old charger plates and turn them into DIY decorated charger plates. You can add any images you want to decorate your charger plate to give them a personal touch.
A while back, I found some charger plates at the GOODWILL store for a one-time occasion. I bought eight silver charger plates for a total of $1.99; great deal!!!
I never used them again after one time, so I put them to good use.
After that, they sat in my studio, gathering dust and taking up much-needed space.
Since I’m all about repurposing items around the house that no longer serve a purpose, I decided to make the charger plates into wall art using decoupage and mod-podge.
WHAT IS DECOUPAGE?
Decoupage is the art or craft of decorating objects with paper cutouts.
WHAT IS MOD-PODGE?
Mod Podge is a water-based glue applied to seal your art piece.
The most common items to decoupage are jars, furniture, shoes, jewelry, etc.
For this DIY Decoupage Project, I will set my sites on decorating charger plates with my favorite classic rock bands, then repurposing them into wall art pieces.
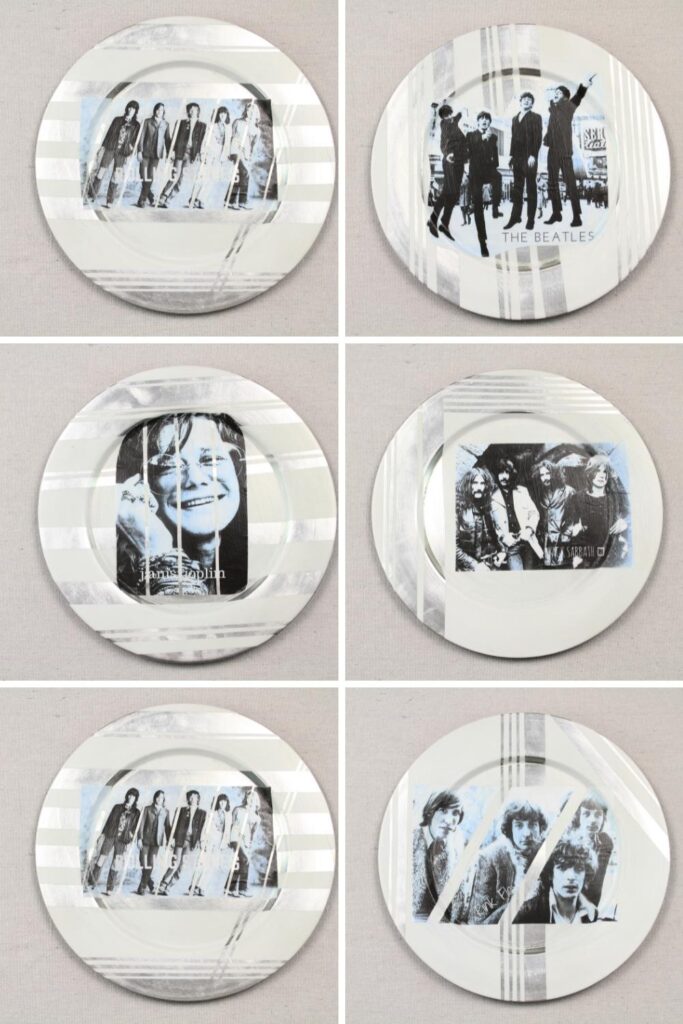
My top five all-time favorite classic bands are PINK FLOYD, THE BEATLES, JANIS JOPLIN, BLACK SABBATH & ROLLING STONES.
Back in the day, my mom listened to these bands. When I was a little girl, I remember playing her albums on her record player when it was my turn to wash dishes.
Do you remember the record player? OMG, The good old days! Honestly, I still have a record player and vinyl albums, and I play my albums all of the time! 🙂
When decoupaging, there are endless materials you can use for your project, such as family and wedding photos, fabric, embellishments, decorative paper, and so on…!
Not sure what a charger plate is?

A charger plate is a beautiful decorative base setting for which other dinnerware is placed on top for formal occasions.
Charger plates are most often used at weddings, catered events, and holidays.
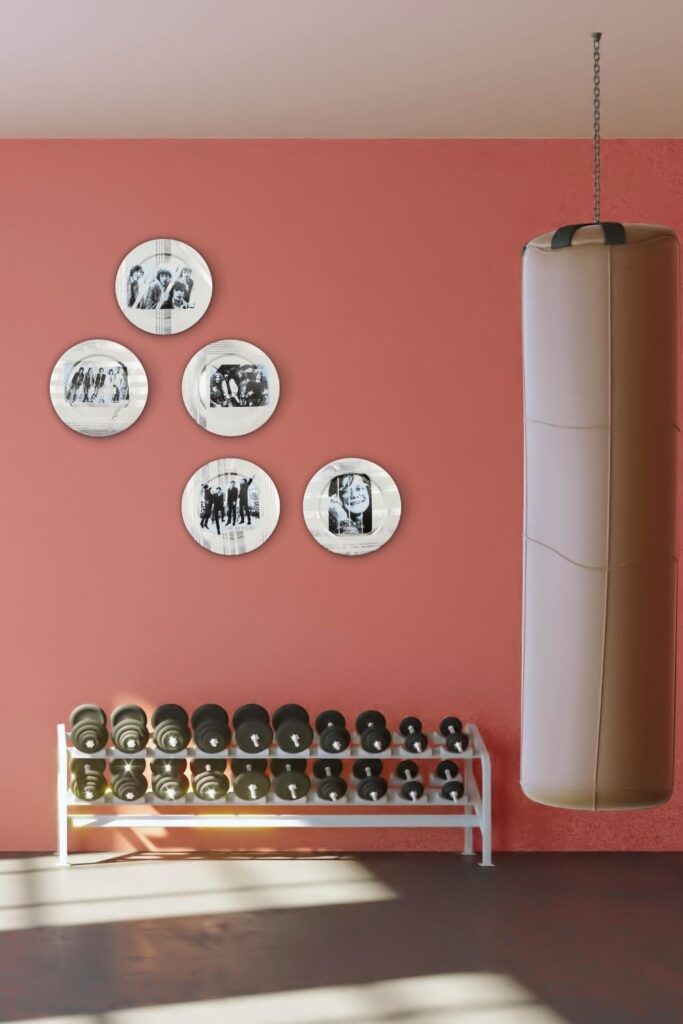
Making DIY decorated charger plates is a budget-friendly craft idea that adds a personal touch to your space. You can’t beat this for easy home decor!
Decorated Charger Plate SUPPLIES
Supplies needed for one decorated charger plate:
- Mod Podge Matte or Shiny [i used matte]
- Charger Plate(s)
- Foam Brush
- Painters Tape
- Scissors
- Photos or images printed on paper
- Spray Paint
- Frame Hanging Brackets
- Gorilla Glue or Super Glue
Please note: This project is not dishwasher safe, and placing food onto the finished decoupaged plate is not recommended.
There is a dishwasher-safe Mod-podge available at your local craft store. Unfortunately, I didn’t have any while doing this project.
If you don’t have a food-safe Mod-podge and plan to serve food on your decorative charger plate, you should consider using a transparent plate on top of your decorated charger plate.
In addition, before you begin this project, if you’d like to change the color of your charger plate, be sure to paint it your chosen color and let it dry before you begin.
Without further ado, let’s get started! First, I’ll show you step by step how I decorated mine.
STEPS 1-4
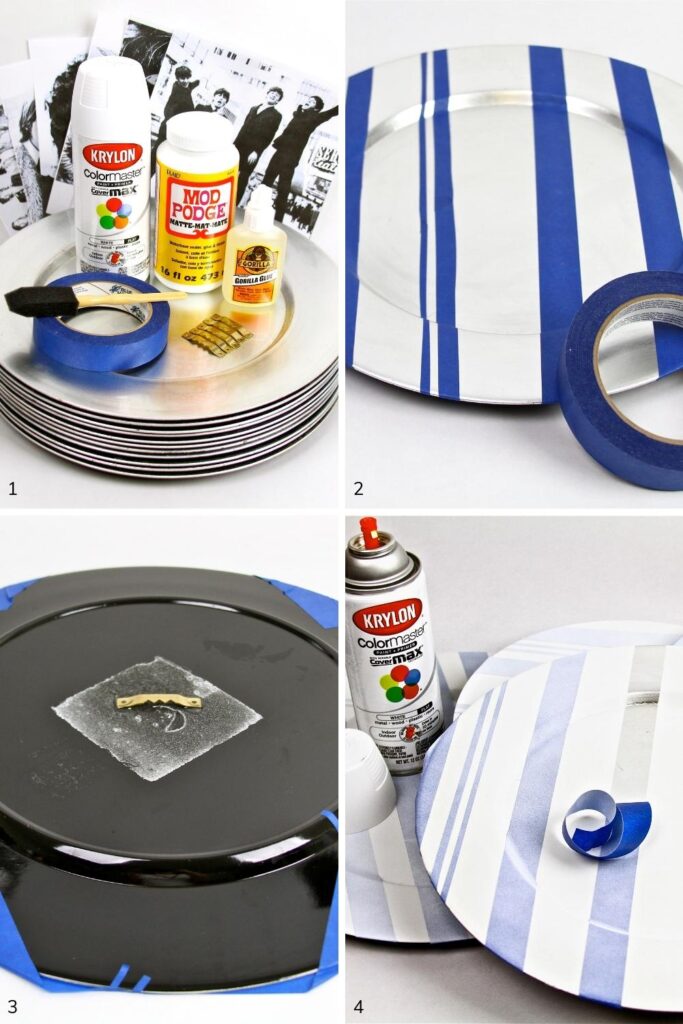
STEP 1:
- Gather and prep all of your supplies.
- Prep your decoupage items.
- Ensure the charger plate(s) are clean and free of dust.
STEP 2:
I’m happy with the color silver on the charger plate. I’m going to add contrast to the silver by adding fun angles to add some interest.
Place your desired angles onto your plate using strips of painter’s tape. You can have broad stripes, thin or zig-zag stripes, or none at all.
STEP 3:
You can choose to add the brackets now or add them afterward.
*If you’re going to use your decorated charger plate as wall art, flip your plate front face down.
Then, place one bracket in your desired location and dab a small amount of Gorilla Glue or super glue to secure it. Let it dry completely before hanging.
STEP 4:
Spraypaint your plates with any color you like. For mine, I chose Krylon Color Master in Flat White. For some reason, the white paint looks gray in the photos. Sorry about that! Oops!
Once the paint is dry, slowly peel the tape off.
This Krylon paint is my favorite! I use this for most of my painting projects. It has paint & primer, all in one can, and it dry’s so quickly.
Steps 5-6
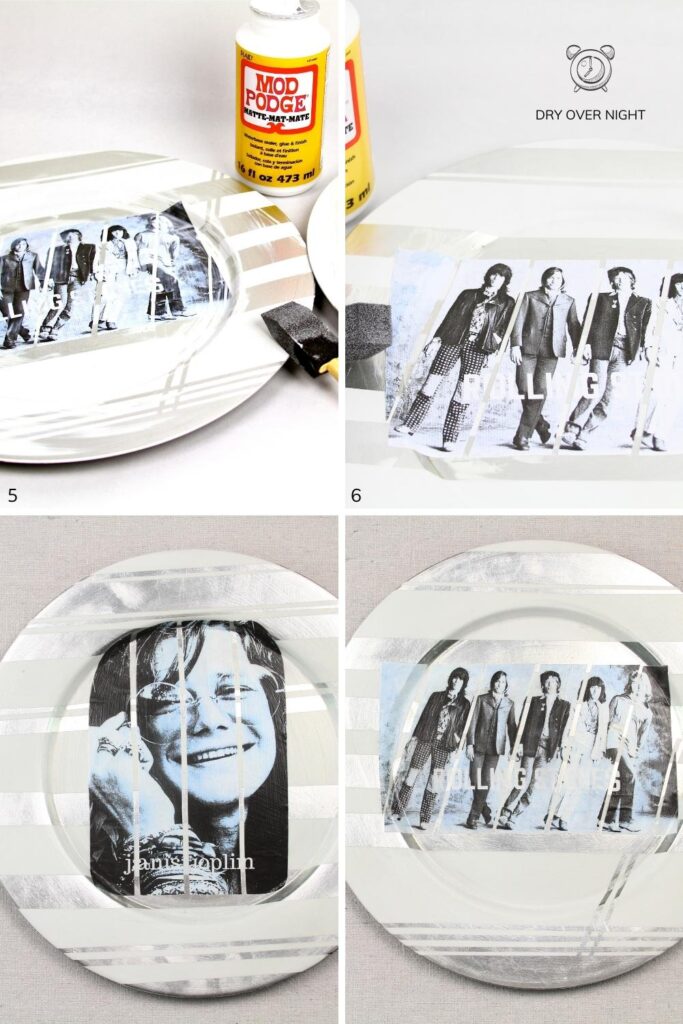
STEP 5: Dip the tip of the foam brush into mod-podge, apply it to the back of the photo or printed image, and put it on the plate.
Position your photo or printed image anywhere on the plate you desire.
You can decorate the entire plate to make an image collage if you desire, or choose to keep it simple with one photo for each charger plate, as I did with my favorite bands.
Apply the mod podge onto the top of the photo(s) and the entire top of the plate with a couple of layers to completely seal the decoupage.
Make sure you don’t have any bubbles on your photo or air bubbles in the mod podge. You can use a thin needle for popping the bubbles if you do.
STEP 6: Set aside and let it dry overnight. And that’s it! Super easy-peasy!
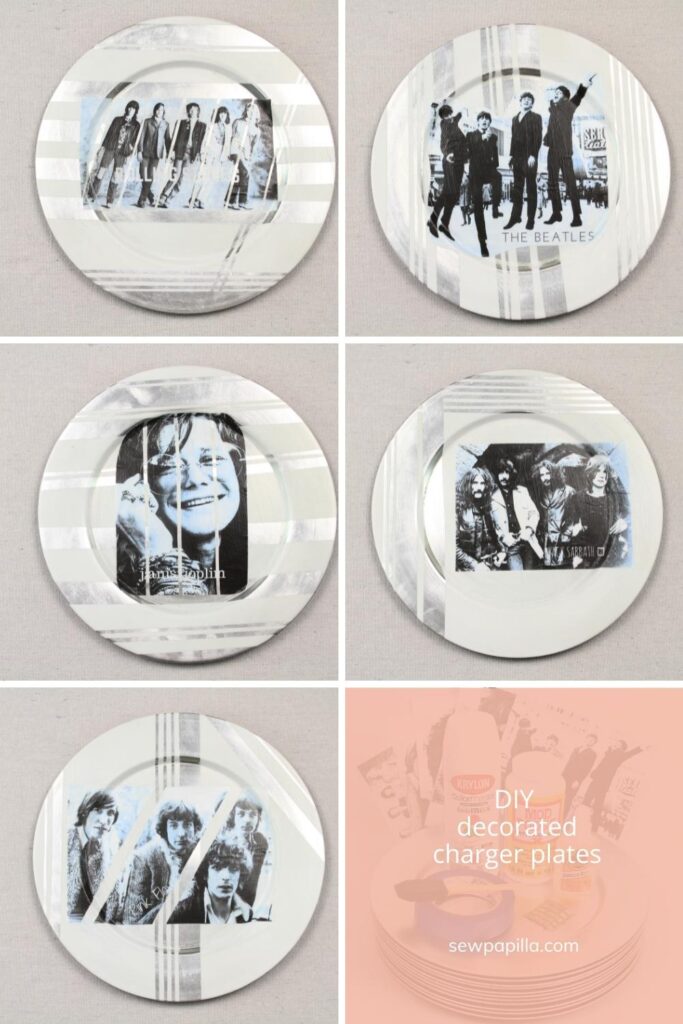
TAKE AWAY
To sum it up, my dusty and old charger plates laying around are now fun wall art I won’t get tired of admiring.
Whenever I see the wall art, I’ll think of when I played my mom’s classic albums on her record player when I was a little girl. 🙂
Ultimately, this idea is super easy and can be done in 6 steps!
In addition, the supplies needed for this project you may already have in your home. Win, win! 🙂
I hope you enjoyed learning how I styled my charger plates. I’d love to hear your thoughts. Leave a comment, share it, Pin it, and be sure to tag a photo on Instagram to #sewpapilla.
I’d love to see your results!
